
This tutorial uses my 7/8” squares template. However, it can be modified for any template. For circles, use square images and let the template make the circles (that’s what it’s there for), and always make sure to make your images slightly larger than the template calls for no matter what size or shape it is. You need to overlap to make sure it prints properly.
- Open both your template and your photo(s) in GIMP. I suggest only working with a few photos at a time to avoid slowing down your computer.
- If your photo isn’t the right shape (in this case square), you’ll have to crop it. The most accurate way to do this is by resizing the canvas.
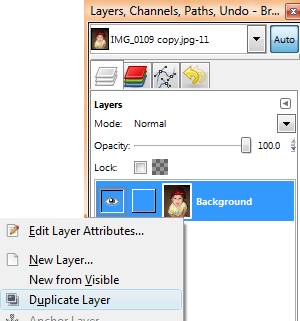
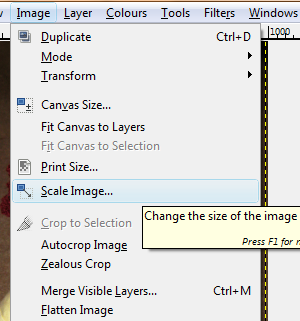
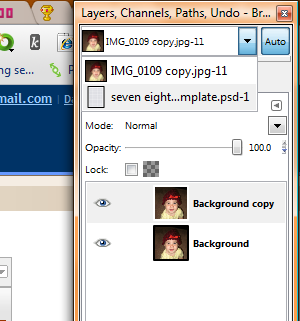
- Make a new layer from the background (right click on the layer and select "duplicate layer" as shown below).
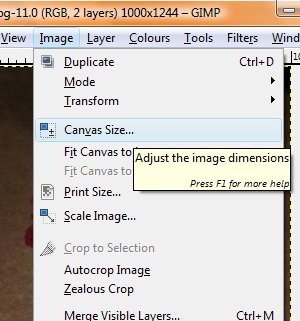
- Click image - canvas size
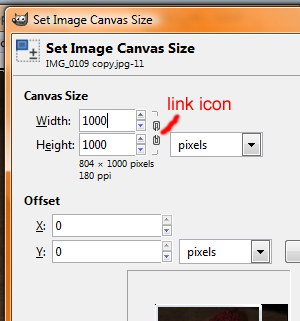
- Make the width and height values. In this case, my image was 1000x1244, so I made it 1000x1000. You may have to click on the little link icon to un-link the two values. If you don't, it will try to keep the same dimensions. Click "resize" when you're done.
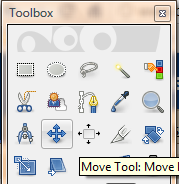
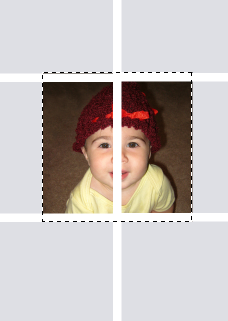
- Did an important part of your photo get cut off? Click on your move tool and drag/drop your image to where you want it. This is why we made a new layer earlier.
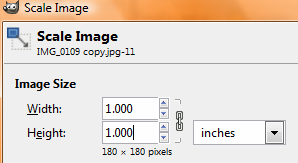
- Now go to image - scale image.
- Click on the first drop down menu and select "inches".
- Change the width and height to something slightly bigger than the size of the squares (or circles, rectangles, ovals, ect) on your template. In this case, it's 7/8", so we'll make it 1". Once you've put in the values, click "scale".
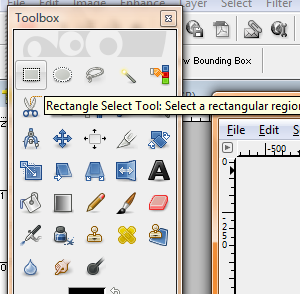
- Now grab your rectangle select tool.
- Click on the grey area past one corner of the image and drag it past the opposite corner, completely encasing the image, before letting go of the mouse button.
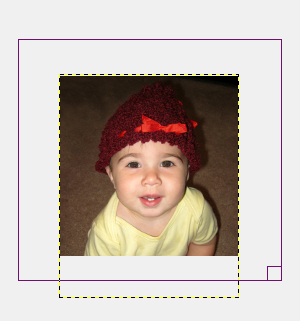
- You should now see marching ants around the edge of your image. Click edit - copy or ctrl+c.
- Go to your template by clicking on windows - your file name.
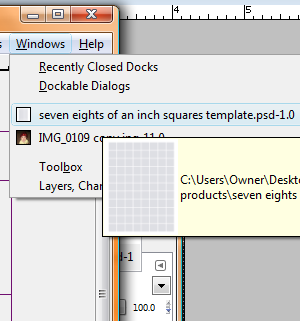
- Change the layers menu to show your template as well by clicking on the dropdown menu above the layers menu and finding your file name.
- Your photos will be pasted on top of whatever layer you have selected. In my templates, this means you want the middle layer (the grey squares, in this case) selected.
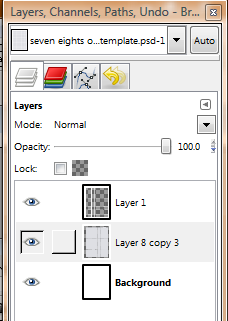
- Go to edit - paste or ctrl+v and you'll see your image appear under the white grid. Grab your move tool again and drag/drop it in one of the squares.
- Repeat with your other images.
- Don't forget to save!
Note: This tutorial assumes your image is 300 dpi like my templates. If it isn't, you will have to resize that as well. When you click "scale image" in step 3, change the x resolution and y resolution to 300 and click "scale". Then go to "scale image" again and continue with step 4.
Hope that helped. Feel free to ask any questions you might have. This is the first tutorial I've made in a long time, so I'm sure it could be improved.
Hope that helped. Feel free to ask any questions you might have. This is the first tutorial I've made in a long time, so I'm sure it could be improved.
This comment has been removed by the author.
ReplyDelete